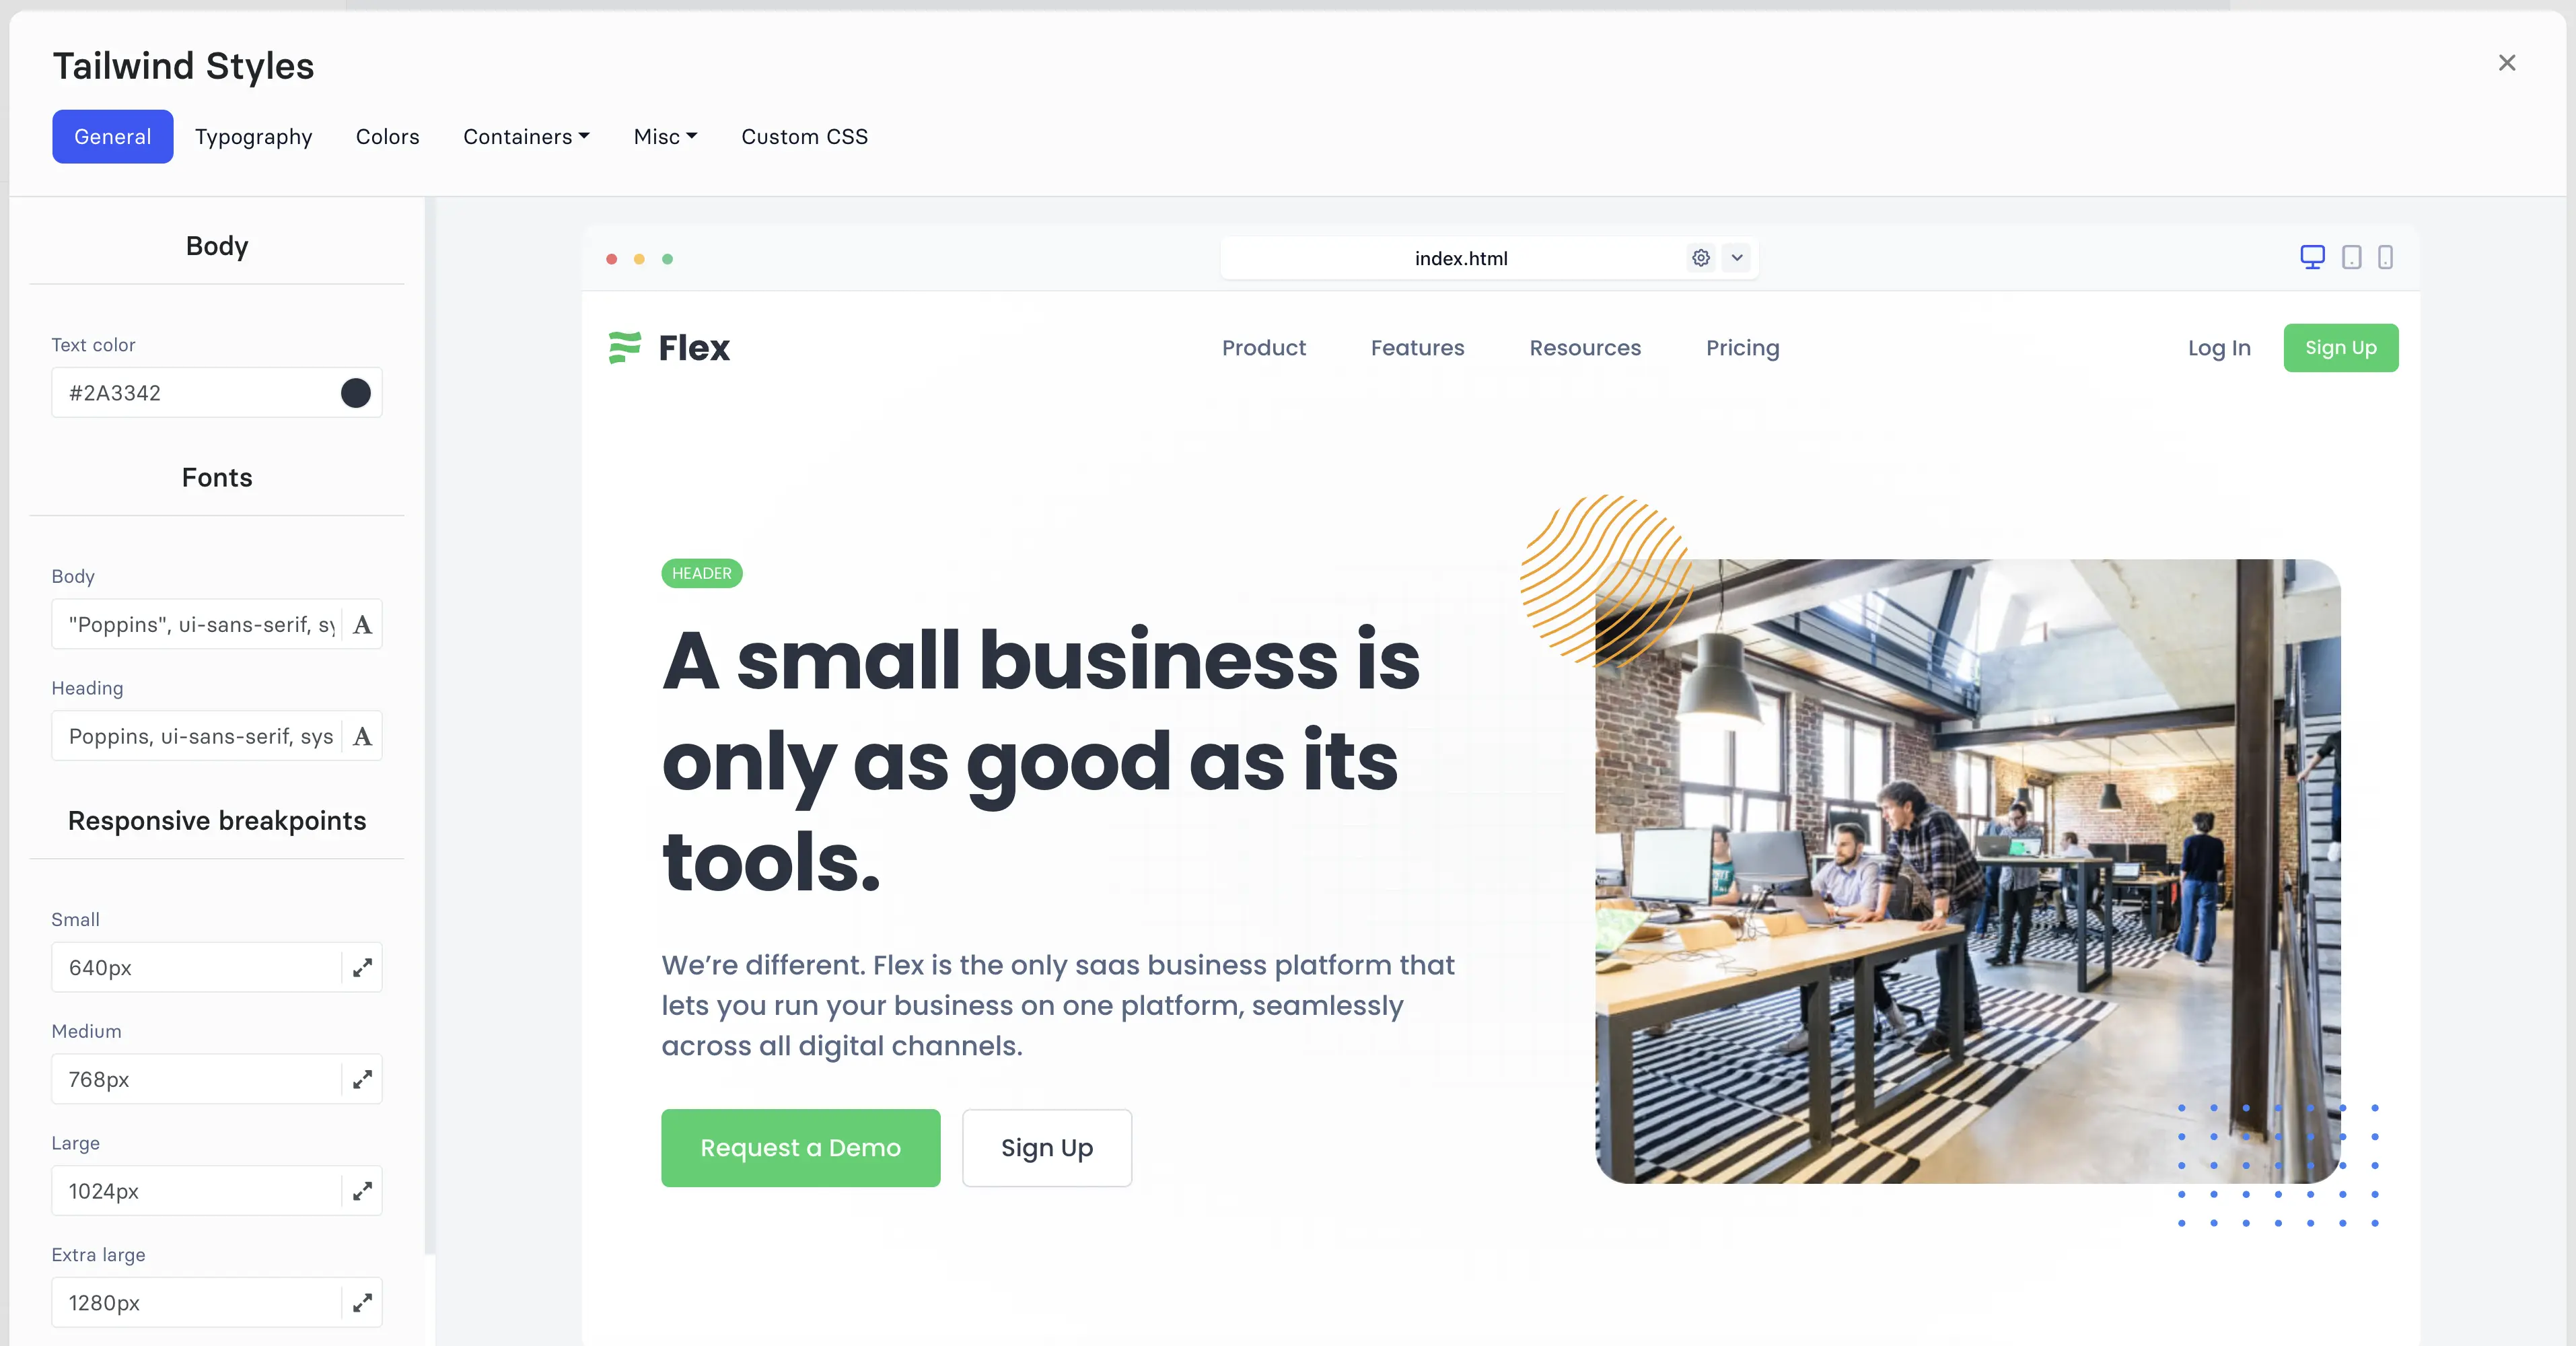
Change styles is a feature that allows you to change the appearance of your project. You can change the colors, typography, and many other options.
You will find the "Change Styles" button at the bottom left of the editor. Click on it to open the styles panel. After opening the panel, you will see the following tabs: General, Colors, Typography, Custom CSS, and other tabs depending on the chosen library. Each tab has its options for changing with a live preview.
You can change each option:
Additionally, you can change all options by manually entering their values. You can also reset all options to their default values by clicking the option's label.

In the general section, you can change some basic options, such as the background color, text color, main fonts, and breakpoints.
In the colors section, you can change your project's color palette. The colors depend on the library you choose.
You can change each color by selecting it from the color picker or entering the value manually. All colors can be reset to the default value by clicking the color label.
In the typography section, you can change your project's font types, sizes, weights, spacing, and line height.
Each font type can be changed from the font picker. Sizing, weights, spacing, and line height can be changed from the size picker. Additionally, you can change the font by manually entering the value. All options can be reset to the default value by clicking the option's label.
You can add your own CSS code to the project in the custom CSS section. Write the code in the input field and click the "Save" button.
The CSS code will be added to the project's HTML files.
Many other options depend on the chosen library, such as spacing, border, and width. These options can be changed in the same way as the general, colors, and typography sections.
© 2026 Shuffle. All rights reserved.